It’s ‘Be Kind to Hammers Week’ –
If you told someone you like to restore hammers, they might think you lazy. Aside from tightening the head on the handle, what else is there to do?
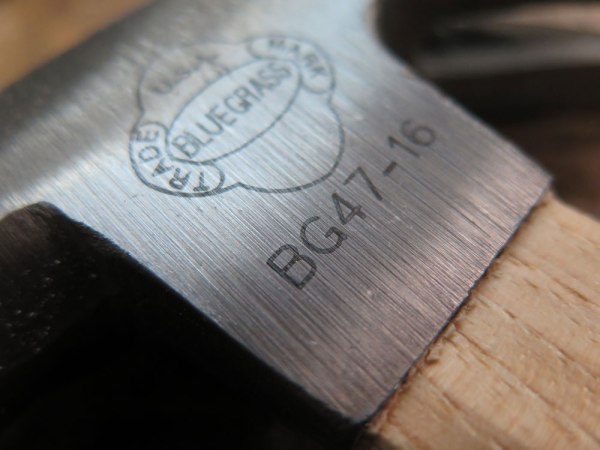
Today during a lull at The Furniture Institute of Massachusetts, I spied a hammer on a student’s bench and had to snatch it. It was a Bluegrass 16 oz. claw hammer. Though this hammer isn’t made anymore, the student had one that was still factory fresh – or “new old stock” as the collectors call it.
The head and handle were still covered with factory goop. So I sneaked away with the tool while the student was occupied.
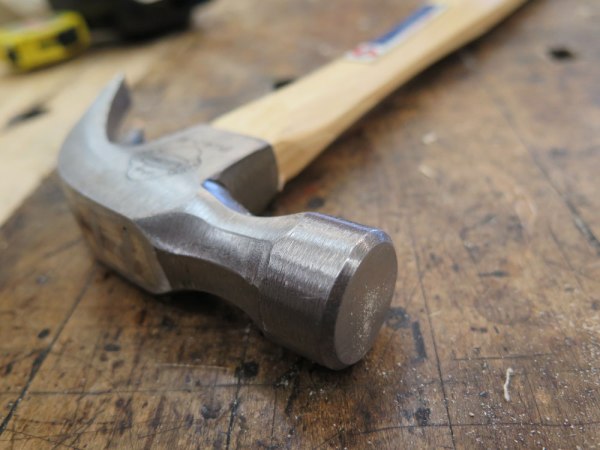
Step 1: Get the goop off. Yes, it protects the hammer from rust while it is on the shelf at the store. But it is as attractive as the plastic covers on the furniture in your grandmother’s fancy “drawing room.” Lose it. Remove it with solvent or elbow solvent.
Step 2: Dress the striking face. Sand the face of the hammer to remove the rough milling marks and to ensure the face is very, very slightly bulged. (It should come made this way, but the sandpaper ensures it will be that way.)
I usually start with #150-grit and finish with #220 – at most.
After you sand the face, don’t touch it with your hands. Ever. If some numbskull touches the face, dress it (the hammer head, not the numbskull) with sandpaper. Any lubricant on the striking face encourages the face to slip off a nail head.
I then returned the hammer to its owner.
— Christopher Schwarz