Benjamin Seaton Squares in Old Mahogany –
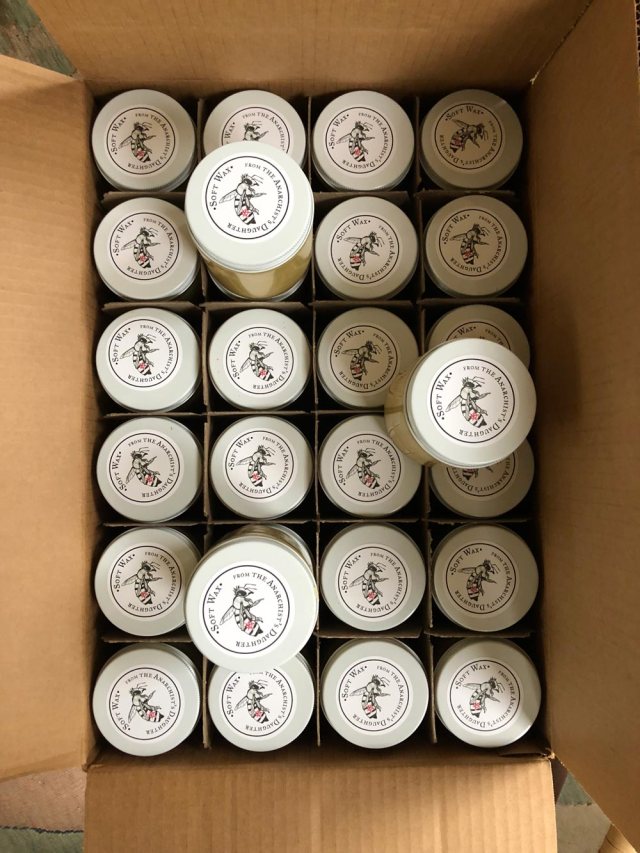
This week I’m finishing up a run of a dozen Benjamin Seaton try squares for friends and customers (sorry, they are all spoken for). Oh, and I’m going to talk about building them on “The Woodwright’s Shop” during a taping on Sunday.
The squares and the material I’m using are quite interesting in my opinion. Also interesting: The stupid mistake I made that led to a little detail about try squares I’d never considered.
The construction details of these squares comes from a must-have book for hand-tool nerds: “The Tool Chest of Benjamin Seaton 2nd Edition,” which is available at Tools for Working Wood and other retailers.
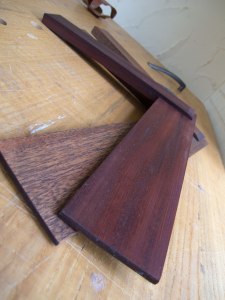
Seaton built three mahogany squares for his chest, and I’m replicating the small one, which has a 15”-long blade and a stock that is about 11” long.
Despite its simple appearance, this square is more challenging to build than the Roubo try square that I can now almost build in my sleep. Though the French square has more flash with its scrolled ends, the Seaton square has complicated joinery and wide chamfers that are tough to get just right.
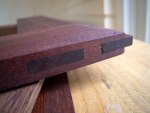
The blade of the Seaton square is a two-pronged tenon that passes into the stock. The top tenon goes into an open bridle joint on the top of the stock. The lower tenon goes into a 1/4”-wide through-mortise.
The joint has to be bang-on to work. And when you assemble the square, you have to drive the blade in dead straight. Cock it at any angle and the blade splits.
In fact, all three of Seaton’s squares were split at this point – perhaps due to seasonal wood movement; perhaps to the assembly process.
The first time I built one of these squares in early 2012, I did a dumb thing. The drawings for the square are on the same page of the book as a profile drawing of Seaton’s scriber. At first glance, it looks like the drawing of the scriber is actually a drawing of the blade in plan view.
The reason I was so easily fooled by this gestalt is that the text indicates that the blades of the three squares taper in thickness. So I tapered the blades dramatically – like the taper of the scriber.
I discovered my mistake later, but in the meantime I used the snot out of the square and found that the tapered blade was ideal for hand work. When the square is applied to the edge of a board, the taper tilts the stock slightly so it reads only on the top corner of the board. This is nice if you are dealing with an edge that isn’t perfect or has lumps.
The Mahogany
Last year I bought a truckload of old wood from a retiring woodworker. As we were loading up the last of the stock, the woodworker’s wife implored me to take some old table parts that were cluttering up her garage.
They sure didn’t look like much – some busted tops and extension leaves that were covered in many coats of a black finish. I was hot, tired and ready to go home, so I threw the pieces on top of the pile in the truck and headed out.
Earlier this year, I pulled out some of the table parts to use as secondary wood on a campaign chest. The undersides of the pieces were covered with the tell-tale signs of handwork – no machine marks. Lots of sawblade marks from a large circular mill. All the hardware was let in by hand. Knife marks were everywhere. And the edge detail on the leaves was one that hasn’t been popular for a very long time.
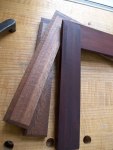
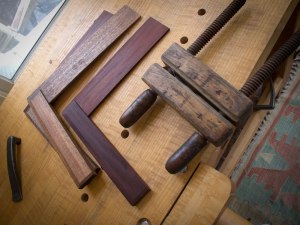
Once I planed the finish off the boards, I was totally enchanted. The mahogany was darker, denser and tighter than any I’ve ever laid my hands on. And these boards were 30”-wide planks – not pieced together.
Even more shocking was what the stuff looks like with a little oil on it. It’s gorgeous and purple and dark – much like Seaton’s squares.
I still have two more planks of this stuff, perhaps enough for a small campaign lap desk.
— Christopher Schwarz